Tasks are the operations that will allow you to Populate, Update, Generate Reports, and Refresh in order to integrate your data between QuickBooks and your database.
- Populate from QuickBooks: query all records from QuickBooks (depending on the tables selected. If All Tables is selected, LetSync Desktop will query all the records from all of the tables of the QuickBooks Desktop company file) and send the records to the database. This task is ideal as Initial Task or Re-Populate database in case the database data is not synced with the QuickBooks company file data.
- Refresh from QuickBooks: check on the history table (it is created on the database schema) to get the ModifiedDateTime information. LetSync Desktop will send that DateTime to QuickBooks. Then, QuickBooks will return all the records that were added, updated, and deleted from the company file. This task is ideal for daily, hourly use. If the Populate from QuickBooks on the tables hasn’t run yet, this task will not work because it requires an initial Populate task to be run previously.
- QuickBooks Report: retrieve reports from QuickBooks and send them to the database. Memorized Reports aren’t supported.
- Update and Refresh: will run a refresh in the table if was previously populated. Then, query the database looking for the records that on the OPERATION field are set with (add, update, or delete). it will do the change in QuickBooks. After updating QuickBooks, LetSync Desktop refreshes each record back on the database.
- Update to QuickBooks: it will query the database looking for the records that on the OPERATION column are set with (add, update, refresh, or delete). it will do the change in QuickBooks. The database won’t be refreshed. If you have the option “Set Operation Field To Task Result” checked on the Settings, then the OPERATION column will be the only one changing, this avoids duplications.
Before adding a task, you will need to have a QuickBooks company file configured and a connection to a database.
Right Click on the task you want to see then View:
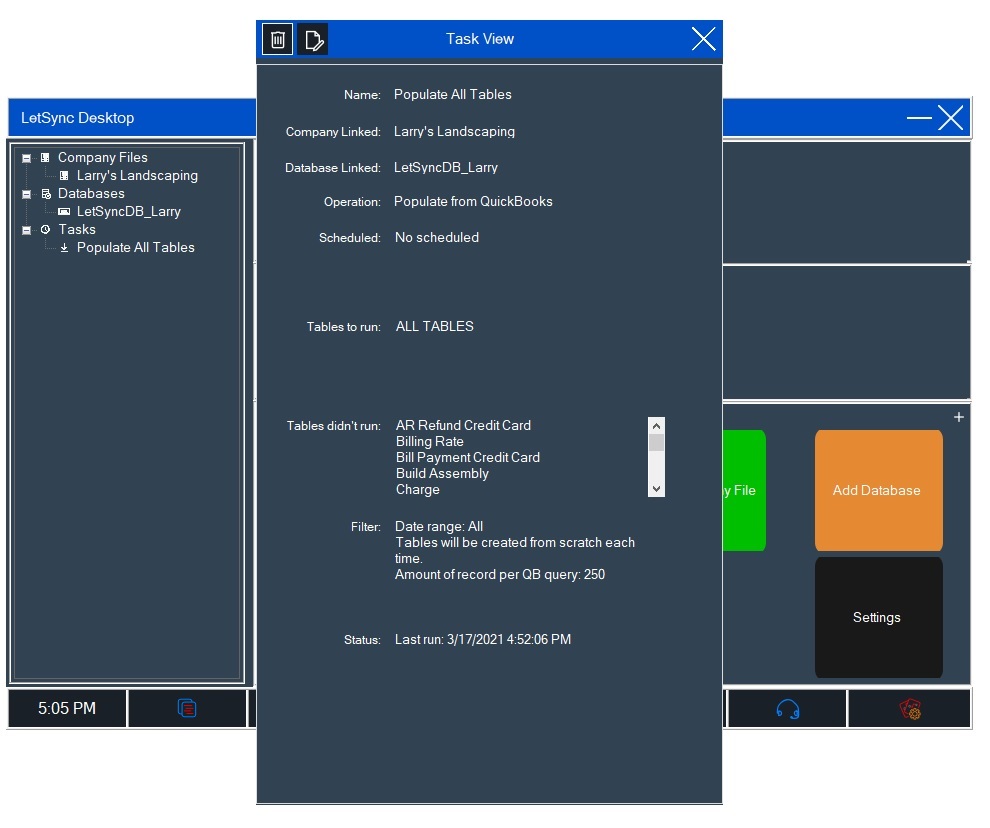
The top left button will give a shortcut to delete and edit the task. The task can be deleted always. After deleted, you won’t be able to recover it. You will have to recreate it again.
These windows will tell you:
The display name of the task on LetSync Desktop.
- The QuickBooks company file is linked to it. One task can only be linked to one company file.
- The operation that the task will execute.
- If the task is scheduled or not.
- The tables that will be run on this task for the operation have already been chosen.
- Tables that didn’t run. This can be because those tables either aren’t supported for the version of QuickBooks that you have or because the was an error thrown while running it (check Error Table or Log Files for more information).
- The filter that you set while creating the task that you selected.
- The status of the task. This will tell you if the task already ran and when it did. Or if the task hasn’t run yet. For the scheduled task, it will tell when it is the next time it will run (it will run as long the Task Scheduler Server is running).
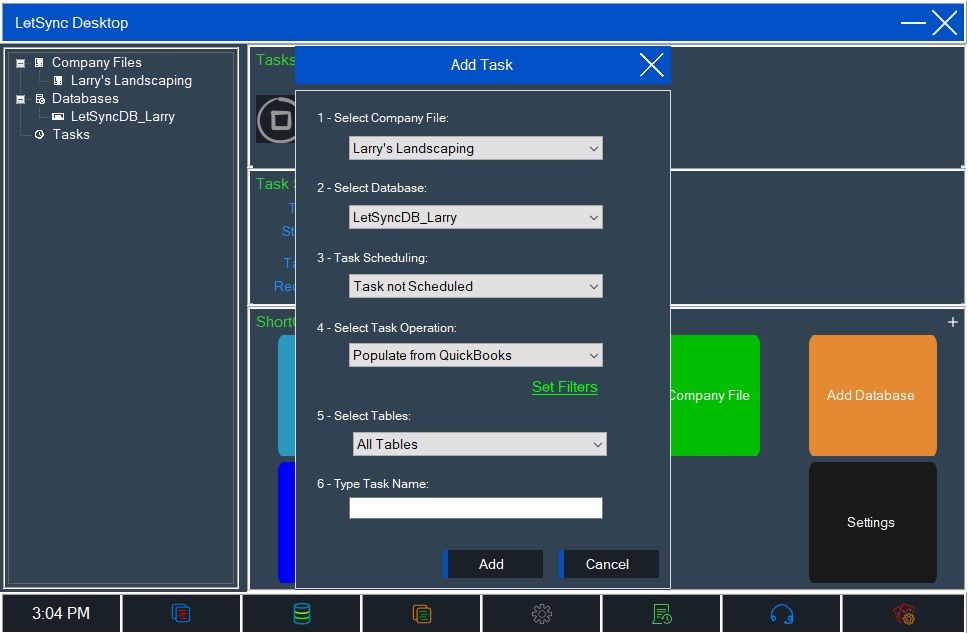
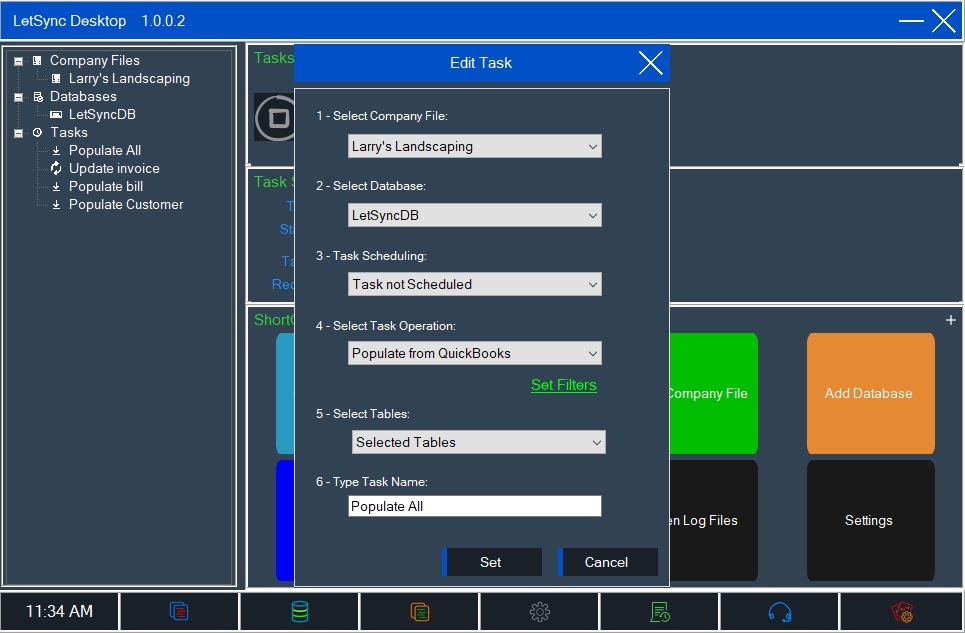
When adding a task will have to fill out 6 sections, 7 if we count the filters. Most of them will be previously filled by the first added first showed. You will be able to change the selection with other options that will appear on the drop-down menu.
- Select Company File: these are the QuickBooks company files already configured for you. You can add unlimited QuickBooks company files to LetSync Desktop.
- Select Database: these are the databases that you already connect to LetSync. You can add unlimited databases to LetSync Desktop.
- Task Scheduled: tasks can be scheduled or not. No scheduled task will need to be run manually on LetSync Desktop UI or by the LetSync Console module. The scheduled task will only run automatically if the Task Scheduler Server is running.
- Select Task Operation: you will have 5 operations in total. The operation that you pick will determine the direction and the amount of data that will be handled.
- Populate from QuickBooks: will always get all the data from QuickBooks and send it to the database.
- Update and Refresh: this will only work if the “Operation” field is set to “add”, “update”, or “delete”. It will handle the operation against QuickBooks and LetSync Desktop will refresh your database with the fields that only QuickBooks is allowed to generate.
- Refresh from QuickBooks: will only get the new entries from QuickBooks from the last date to now that the table was populated to the database. If the tables haven’t been populated yet, this operation will run a full populate on the table then. This is the recommended task for daily populating to the database.
- QuickBooks Report: will query the report that you can generate in QuickBooks and you will be able to dump it on the database. See the QuickBooks Report section for more information on this operation.
- Update to QuickBooks: this will only work if the “Operation” field is set to “add”, “update”, or “delete”. It will handle the operation against QuickBooks and LetSync Desktop won’t refresh your database.
- Set Filters: This will allow you to set some filters for a specific task. See the Set Filters section for more information on how to set them and what the impact on the data and flow will be.
- Select Tables: this will allow selecting one, many, or all tables that will run this task.
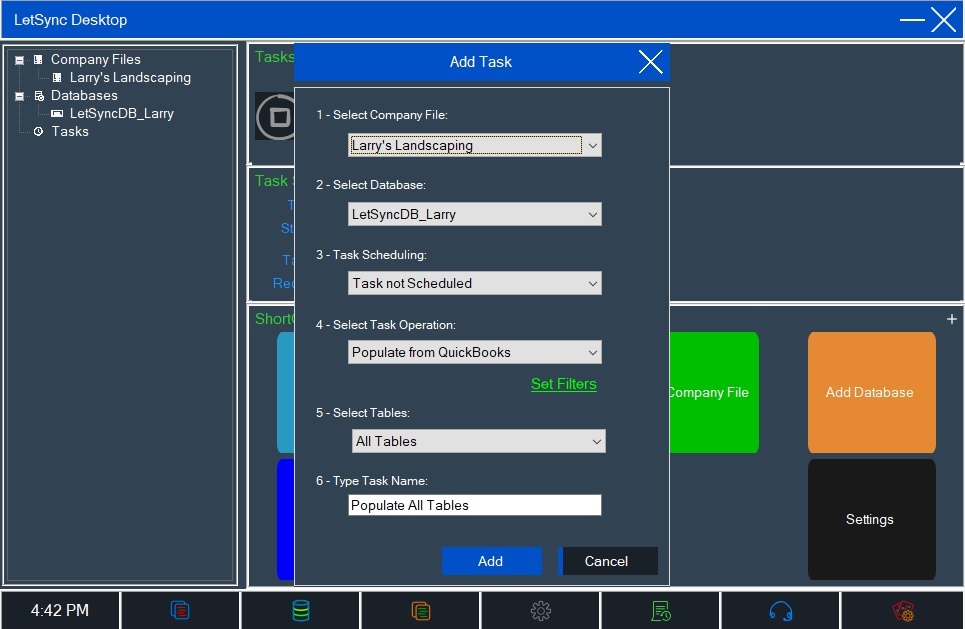
- Type Task Name: this will be only the name that you want to identify this task on your LetSync Desktop UI.
Right Click on the Tasks label then Add New:
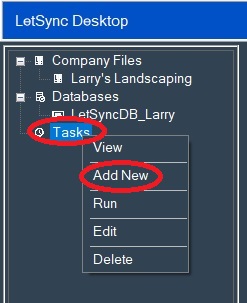
Add Task windows will open:
Enter the name that you want the task to be labeled on LetSync Desktop and click on Add.
After configuring the company file, create a connection to your database, and add a task. You are ready to run that task a see your data sent to your database or push back into QuickBooks, depending on the operation selected.
You will have 3 alternatives to run a task after was added to LetSync Desktop UI. You can not run multiples or the same task from each different module at the same time.
Manually: all the tasks can be run manually (scheduled and non-scheduled) as long the Tasks Scheduler and LetSync Console are not running.
Task Scheduler Server: will only run tasks that are scheduled to run. It will only run while there is a Windows user logged in.
LetSync Console: will run the task at the console windows level. Also, you can run the task interactively with Windows Task Scheduler (this option allows running the task whether a Windows user is logged in or not).
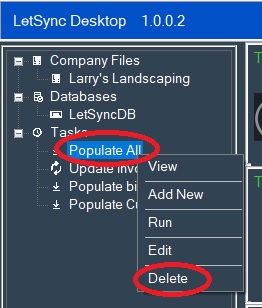
Right Click on the task that you want to run then click Run:
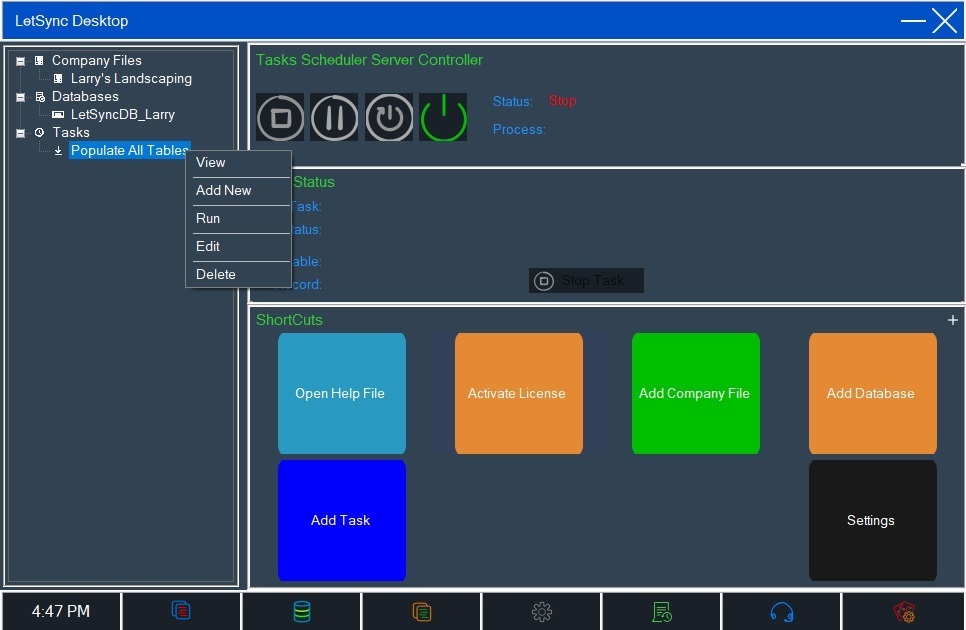
The task will start running and you will be able to see the task process in the Task Status section. Click on Stop Task if you want to stop the process:
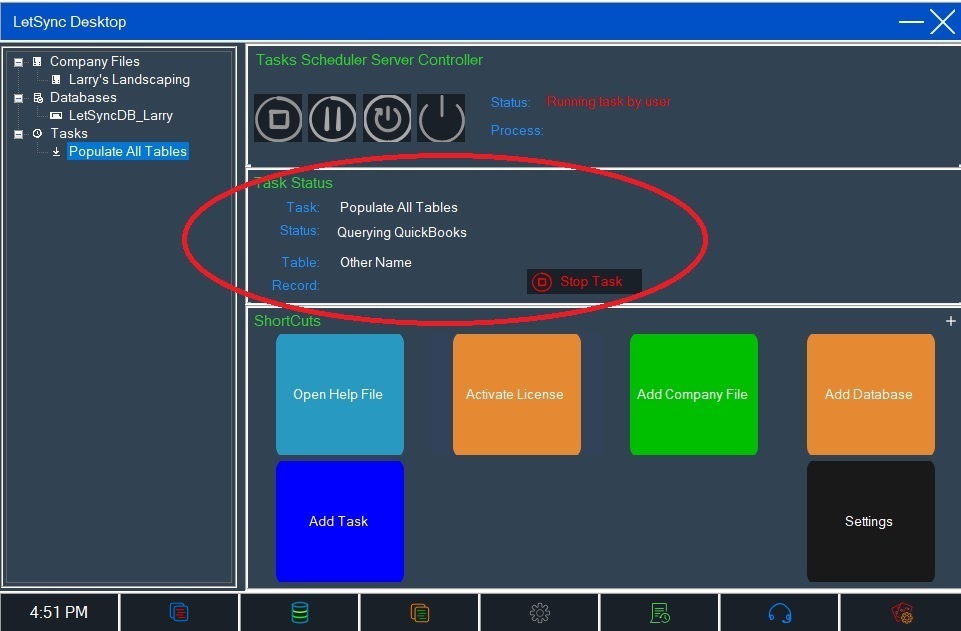
After the task gets completed. Task Status will show the results:
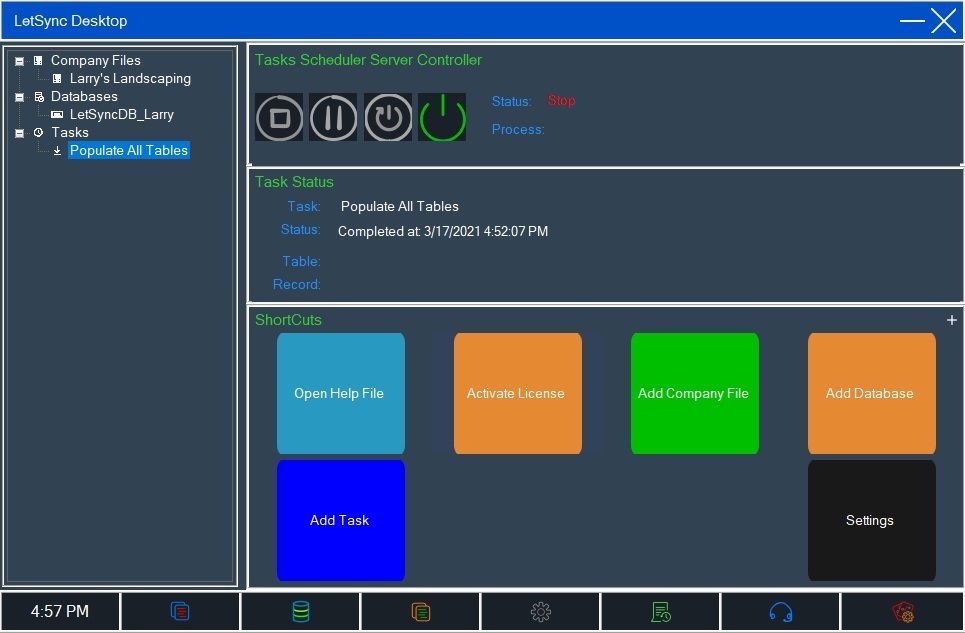
Double-click on the task name to see more results:

Right Click on the database that you want to edit then Edit:
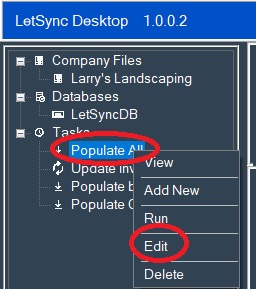
Edit windows will pop up to let you Edit the task. You will be able to edit any of the entries except when it is a Report from QuickBooks, you will have to pick all the reports parameters again (because accounts, entities, items, classes, and transactions would be different from the time that the report was created originally).
Delete a task can be done at any time. There is no restriction to delete a task, like company files and databases have.
Deleted task cannot be recovered but you can recreate it at any time as well.
Task Scheduled: tasks can be scheduled or not. No scheduled task will need to be run manually on LetSync Desktop UI or by the LetSync Console module. Scheduled tasks will only run automatically if the Task Scheduler Server is running.
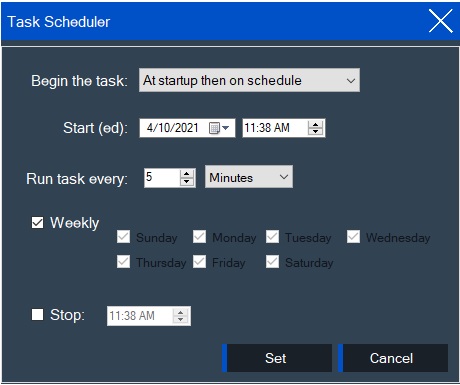
Begin the task:
- At startup then on schedule: the task will run when the Task Scheduler Server starts, then on the picked schedule.
- On schedule: the task will only run when the Task scheduler Server is running and only on the picked schedule.
Start (ed): date and time when you want the task to start running.
Run task every: how often the task will run.
Weekly: you can pick which day of the week the task will run.
Stop: when you want the task to stop running, if you do.
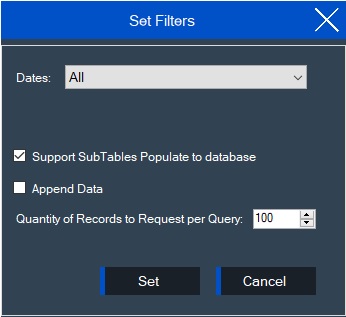
Set Filters: this will allow you to set some filters for a specific task.
Dates: you will be able to pick the date macro or custom date range.
Support Subtables Populate to database: this option will be checked by default. This means that the child tables will be populated into the database as well. Unchecked if you don’t want child tables to be populated.
Append Data: this option will be unchecked by default. This means that the data will be overwritten all the time that you Populate Operation (Refresh Operation always will append the data).
Quantity of records to Request per Query: this is the number of records that will be handled through the QuickBooks SDK. 100 records are the recommended amount of records but you can always increase or decrease in case you ran into a string out-of-memory error.
QuickBooks Report: retrieve reports from QuickBooks and send them to the database. Memorized Reports aren’t supported.
QuickBooks doesn’t effort any documentation on the parameters for reports.
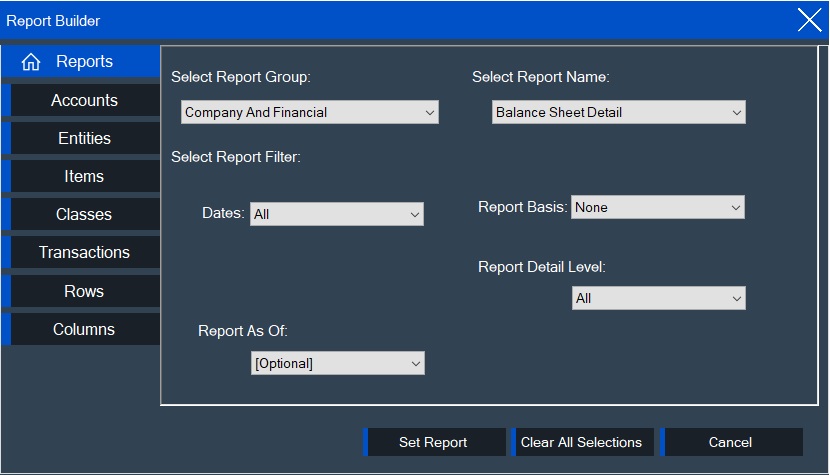
After setting the report, you have to enter a name for the table that will be created to dump the report in the database.


